Used in Securing Cable Railing Hardware
Cable railings are a modern, sleek alternative to traditional balusters and can be used for stairwells, decks and porches. While they may seem complicated to install, they are actually quite easy, with the right tools and knowledge. The key to installing a successful system is understanding how all of the hardware interacts and what each component does.
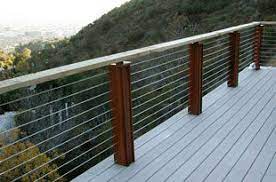
First off, let’s start with the cables. While there are a few different styles of cable, the best for railings are 19×1 (single strands twisted together) Stainless Steel cables. These are safe, strong, and can withstand the rigors of everyday use.
These are strung through your intermediate pass thru posts and your termination posts. These are the most important posts to properly install since they will be under the most tension from cable force. To ensure the longevity of these posts, Post Protectors are available to shield them from any abrasion or contact with your cables.
The other essential part of your cable railing hardware is the hardware that holds and creates tension on the cables. While the majority of these components are stainless steel, some have an aluminum option for a more contemporary look. Most important of these is the tensioner, which can be used in both angled and straight runs. This is a stainless steel, threaded stud that has a cone and wedge that lock onto your cables to prevent them from coming off. Then, once the tension is created, a locking nut can be tightened to secure it and keep your cables in place.
What Types of Fasteners Are Used in Securing Cable Railing Hardware?
While there are several ways to mount this hardware in your wood posts, Viewrail offers a product called DriveTite that simplifies the process. This kit provides all the tools and components necessary to tension an end of cable in either a straight or angled run. Each DriveTite kit is custom manufactured with premium marine grade 316 Stainless Steel.
Next, you’ll need to consider the infill of your cable railing. There are two main options for this, both of which will improve your view: Onyx rods (slim metal tubes that are powder coated matte black) and Endurance rods (1/4” groove-less stainless steel rods that provide a similar look to cable). Both of these options can be installed on either level or angled runs, so you’ll have plenty of flexibility with your design.
Once your infill is selected, you’ll need to select the appropriate length of cable for each run. There are a few factors to consider here, including local building codes and ICC standards. Generally, these require you to use a cable that is capable of supporting at least 500 pounds, which can easily be accomplished with our Stainless Steel cable.
At this point, you’ll be ready to string the cables. You can do this by attaching one end fitting to each end of the cable, then using a tool called a swager to swage the other end on to your terminal post. Once this is done, you’ll be ready to attach your final end cap and tension the system.